How to Brine Chicken: Get Juicy, Flavorful Meat Every Time
Tired of dry, bland chicken? Imagine a roast chicken with perfectly crispy skin, but beneath it, meat so succulent and deeply seasoned that every bite is a revelation. Or chicken breasts so tender they practically melt in your mouth. This isn't a culinary pipe dream; it's the consistent reality you can achieve by mastering a simple, ancient technique: brining. At its heart, a well-executed chicken brine recipe transforms ordinary poultry into an extraordinary meal, ensuring moisture and flavor penetrate right to the bone.
Brining is a fast, reliable path to tender, seasoned poultry with significantly less risk of that dreaded dry meat. This comprehensive guide will equip you with clear ratios, precise timing, and easy flavor enhancements, so your chicken dishes turn out perfectly juicy and delicious every single time. We'll walk you through mixing a simple salt solution, cooling it properly, submerging your bird, and finally, cooking it to a safe and sensational finish.
Why Brine Chicken? The Science Behind Juicy Meat
The concept of brining is deceptively simple: you soak chicken in a saltwater solution before cooking. But the effects are profound, rooted in basic food science that guarantees a superior result. This isn't just about adding salt; it's about fundamentally changing how the chicken retains moisture and absorbs flavor.
The Magic of Salt: How Brining Works
At its core, a wet brine for chicken works thanks to salt. Salt performs two critical functions:
*
Moisture Retention: During brining, the salt solution is absorbed into the chicken's muscle fibers. The salt causes some muscle proteins to denature (unravel), which in turn makes them less likely to contract and squeeze out water during cooking. Essentially, the salt helps the meat hold onto more water, meaning even lean cuts like chicken breasts emerge incredibly moist and tender. This is why you get that noticeable "plumpness" in brined chicken.
*
Flavor Penetration: Salt doesn't just add moisture; it acts as a carrier for flavor. As the salt solution permeates the meat, it seasons the chicken throughout, not just on the surface. This means every slice, every bite, will have a consistent, savory taste. When you add optional aromatics and sugars to your chicken brine recipe, those flavors are also drawn deeper into the meat, creating a more complex and satisfying eating experience.
By understanding this process, you can appreciate why brining is a non-negotiable step for anyone serious about elevating their chicken dishes. It prevents dryness, enhances tenderness, and ensures deep, even seasoning, making it the secret to consistently delicious poultry. While there's also a "dry brine" method (salting the chicken directly), this guide focuses on the wet chicken brine recipe, which offers distinct advantages in moisture infusion.
The Essential Wet Chicken Brine Recipe: Ratios & Ingredients
The foundation of any great brined chicken is a perfectly balanced salt solution. The key to success lies in precise ratios, which scale cleanly for any amount of chicken you're preparing. For accuracy, we recommend using a kitchen scale, but volume measurements are also provided for convenience.
The Golden Rule: Salt Ratios
For a highly effective and safe chicken brine recipe, aim for a **5–6% salt solution**. This translates to 50–60 grams of salt per 1 liter of water. This range is the sweet spot for maximum moisture and flavor without risking overly salty meat, provided you adhere to the recommended brining times.
* **Water:** 1 liter (about 4 cups)
* **Kosher Salt:** 50–60 grams (approximately 3–4 tbsp Diamond Crystal; 2.5–3 tbsp Morton).
* **Ratio Note:** 5–6% salt by weight means 50–60g salt per 1000g water. To make more or less brine, simply maintain this percentage.
* **Important:** If using regular table salt, which is denser and tastes saltier, start at the lower end (around 2.5 tbsp) or even slightly less, and ensure it's non-iodized if possible.
* **Sugar (optional, but recommended):** 15–25 grams (1–2 tbsp). Sugar helps balance the savoriness of the salt and aids in promoting beautiful browning on the chicken skin during cooking.
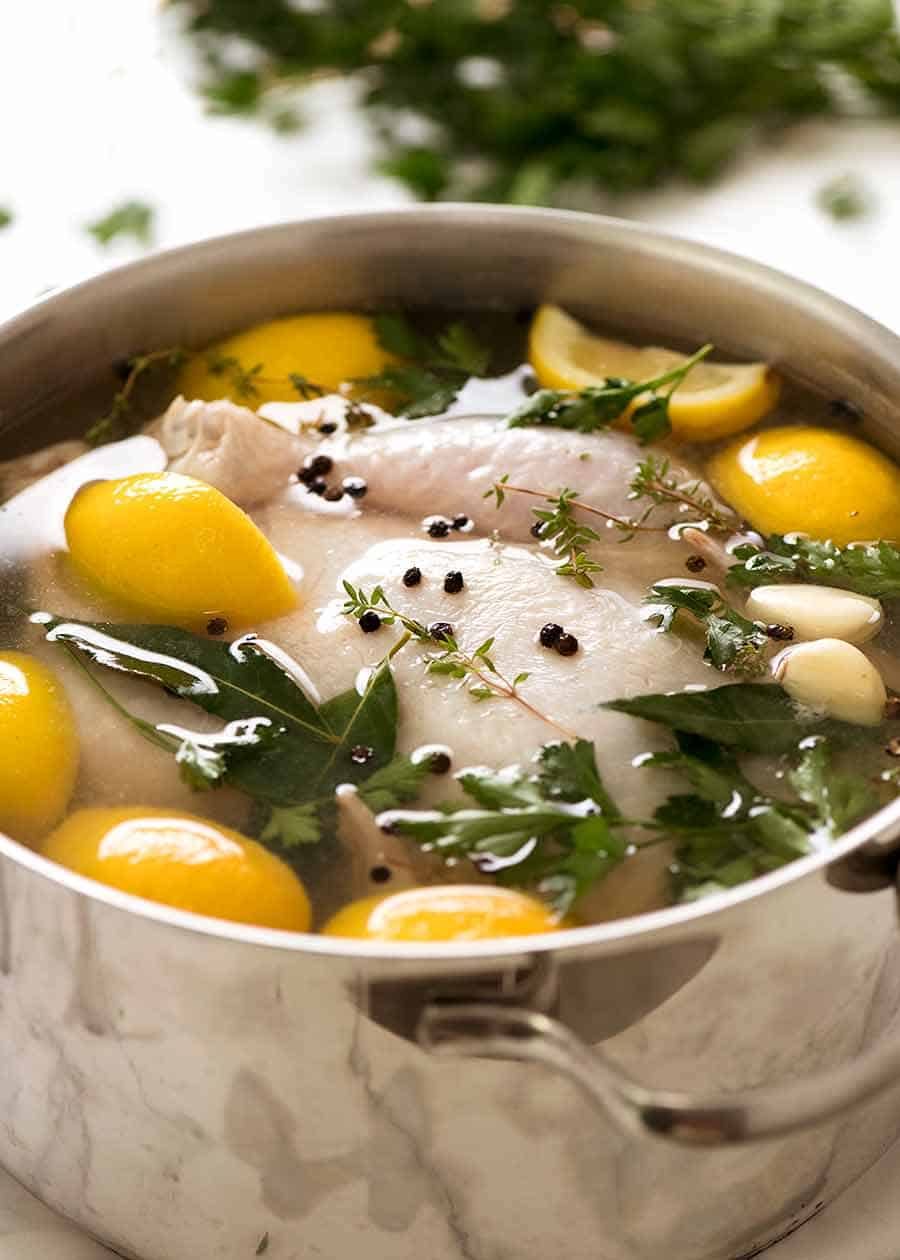
* **Aromatics (optional, for flavor infusion):** 2–3 bay leaves, 6–8 black peppercorns, 2 smashed garlic cloves, a strip of citrus peel (lemon or orange), or a few sprigs of fresh herbs like rosemary or thyme. These additions steep in the brine, infusing their essence deep into the meat.
When considering the right salt ratios for your poultry, delve deeper into the specifics with our detailed guide:
Mastering Chicken Brine: Perfect Salt Ratios for Tender Poultry.
Calculating Your Brine Volume
The amount of brine you need depends on the size of your chicken and the container you're using. The goal is to fully submerge the chicken. A good starting point is often 2-3 liters for a whole chicken, but always ensure you have enough to cover it completely. You can easily scale up this basic chicken brine recipe by multiplying all ingredient quantities while maintaining the 5-6% salt concentration. For instance, for 2 liters of water, use 100-120 grams of kosher salt.
Timing is Everything: Brine Durations for Different Chicken Cuts
While the salt ratio provides the necessary chemical reaction, the duration of the brine is equally critical. Over-brining can lead to overly salty or even mushy chicken, while under-brining won't deliver the full benefits. The ideal brining time varies significantly depending on the size and thickness of the chicken cut. Generally, shorter soaks pair well with a 6% solution, while longer soaks are better suited for a 5% solution.
Here's a handy guide for common chicken cuts, ensuring you get maximum flavor and moisture without compromising texture:
* **Whole Chicken (1.3–2 kg / 3-4.5 lbs):**
* Brine Strength: 5%
* Time: 8–12 hours
* **Spatchcock Whole Chicken (Butterflied):**
* Brine Strength: 5–6%
* Time: 6–10 hours
* **Bone-in Thighs or Leg Quarters:**
* Brine Strength: 5–6%
* Time: 3–6 hours
* **Drumsticks:**
* Brine Strength: 5–6%
* Time: 2–4 hours
* **Boneless Breasts:**
* Brine Strength: 5–6%
* Time: 1–2 hours
* **Wings:**
* Brine Strength: 6%
* Time: 1–2 hours
For an even deeper dive into matching your brining time to specific cuts and salt concentrations, consult our specialized article:
Chicken Brine Recipe: Exact Timing & 5-6% Salt for Any Cut. Remember these are guidelines; very thin or small pieces will absorb salt faster than larger, thicker cuts. Always use your best judgment and consider the dimensions of your specific chicken pieces.
Step-by-Step Brining Process: From Prep to Plate
Once you have your chicken brine recipe ingredients and understand the timing, the execution is straightforward. Follow these steps for a perfect brine every time.
1. Dissolve the Salt and Sugar (and Aromatics)
In a large bowl or pot, warm a small portion of your total water volume (about 1-2 cups) on the stove. Add the salt, sugar, and any desired aromatics (bay leaves, peppercorns, garlic, herbs). Stir continuously until the salt and sugar are completely dissolved. This ensures even distribution and prevents grains from settling at the bottom. Once dissolved, remove from heat.
2. Chill the Brine Fully
This step is absolutely critical for food safety. Add the remaining, *cold* water to the dissolved solution. To rapidly chill the brine to refrigerator temperature, add a couple of handfuls of ice to the mixture, stirring until it dissolves and cools the liquid. Alternatively, place the container in the refrigerator until the brine is thoroughly cold – never submerge raw chicken in lukewarm brine, as this can encourage bacterial growth.
3. Prepare and Submerge the Chicken
Gently pat your chicken dry with paper towels. Place the chicken into a clean, non-reactive container large enough to hold it completely submerged (food-grade plastic, glass, or stainless steel are ideal). Pour the fully chilled brine over the chicken, ensuring it's completely covered. If the chicken floats, place a small, clean plate or a heavy food-safe object on top to weigh it down.
4. Refrigerate While Brining
Once submerged, cover the container and place it in the refrigerator for the duration specified in the timing guide above. **Do not brine at room temperature.**
5. Post-Brine Care: Rinse and Dry
After the recommended brining time, remove the chicken from the brine.
* **Rinsing (Optional but Recommended):** For higher salt concentrations (especially 6%) or if you're sensitive to salt, a quick rinse under cold running water can help remove any excess surface salt. For milder 5% solutions, it's often not necessary.
* **Drying (Crucial!):** This step is non-negotiable for achieving crispy skin and promoting even browning. Pat the chicken thoroughly dry with paper towels. For best results, you can even place the chicken on a wire rack set over a baking sheet, uncovered, in the refrigerator for a few hours (or even overnight) after brining. This allows the skin to air-dry, which is the secret to a truly golden and crisp exterior.
6. Cook as Desired
Your chicken is now perfectly seasoned and prepped for cooking. Roast, grill, pan-fry, or smoke it as you normally would. You'll immediately notice the difference in texture and flavor.
Food Safety First
Always prioritize food safety when handling raw poultry and brines. Ensure your brine is fully chilled before adding chicken, keep the chicken refrigerated throughout the brining process, and clean all surfaces and utensils that come into contact with raw chicken and brine.
Beyond the Basic Brine: Flavor Enhancements & Dry Brining
While a simple salt and water brine is incredibly effective, don't hesitate to experiment with additional ingredients to customize your chicken brine recipe and elevate its flavor profile.
Creative Wet Brine Additions:
* **Acids:** A splash of apple cider vinegar, white wine, or lemon juice can add a bright note, but use sparingly and for shorter brining times, as too much acid can begin to "cook" or alter the texture of the meat.
* **Sweeteners:** Beyond basic granulated sugar, consider brown sugar, maple syrup, or honey for richer, more complex sweetness that also aids in caramelization and browning.
* **Spices & Herbs:** Whole spices like coriander seeds, star anise, smoked paprika, or chili flakes can add warmth and depth. Fresh herbs such as sage, marjoram, or cilantro can also be infused.
* **Other Liquids:** Partially replacing some of the water with low-sodium chicken broth, beer, or white wine can add layers of savory or aromatic flavor.
A Quick Look: Dry Brining
While this article focuses on the wet chicken brine recipe, it's worth a brief mention of dry brining as an alternative. Dry brining involves rubbing salt (and optional seasonings) directly onto the chicken's surface. The salt then draws moisture out of the chicken, dissolves in it, and is reabsorbed, seasoning the meat. The primary benefits are similar (tender, flavorful meat) but without the need for a large container of liquid, and often results in exceptionally crispy skin due to the lack of added external moisture. If the "no-bucket" method appeals to you, dry brining is an excellent choice, but it follows different rules regarding salt application and timing.
Conclusion
Brining chicken is a game-changer. It's a fundamental technique that every home cook should have in their arsenal to combat dry, uninspired poultry. By understanding the simple science behind salt's interaction with muscle fibers and following a precise chicken brine recipe, you unlock the secret to consistently juicy, tender, and flavorful meat. From a whole roasted chicken that impresses your guests to everyday weeknight meals featuring perfectly moist breasts or thighs, brining guarantees a superior culinary experience. So, take the leap, experiment with flavors, and get ready to enjoy chicken like never before. Your taste buds will thank you!